Building your very first app using Sketchware Pro
This tutorial will be your guide towards building your very first hello world app using Sketchware Pro.
Initialization
So the first thing that you're gonna have to do is to download Sketchware Pro.
Then, you'll have to allow the "Access all files" permission and then create a project. Click on the plus(+) icon on the bottom to create a project.
Then enter project info.
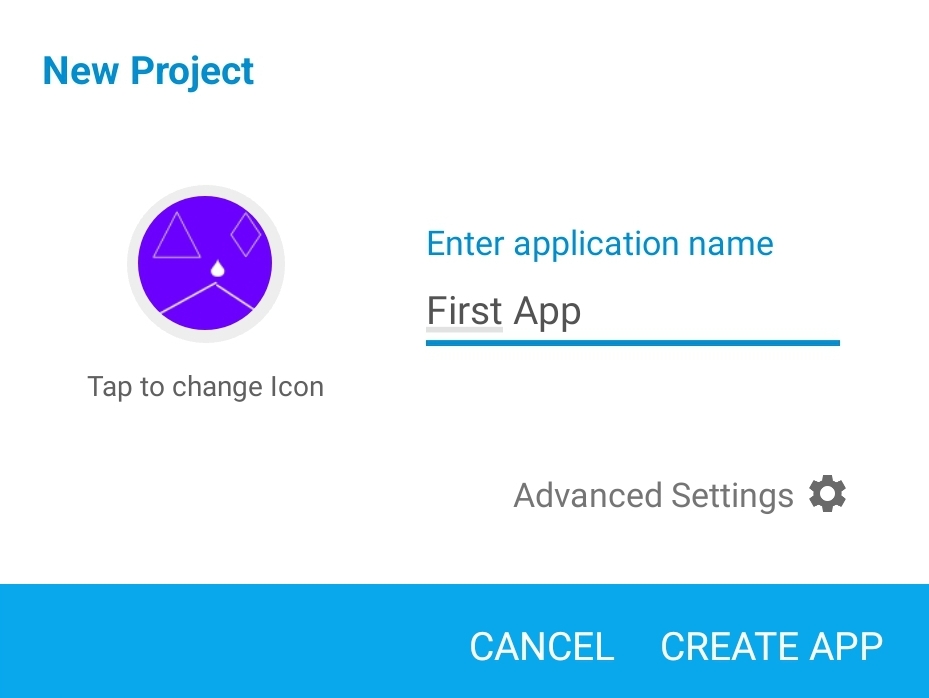 You can choose a icon by tapping on the icon image, and it is not necessary to keep the Application Name "First app".
We do not suggest you to touch anything in Advanced Settings, but If you've used android studio or done android development before, you can change those Settings too.
After that, click "Create app".
Designing
Our app will basically have 2 Activities. In simple definition, a Activity is a Page. Just think of a notebook. Your app is the notebook. And then, the pages in it. Each activity in your app is a page of a notebook. You write and draw visual things on a page, and place visual elements in a Activity. But in a activity, you have more power. A activity can change and perform several tasks. While a notebook page can only hold information.
The layout page or a Activity is something like main.xml, while the program part, is known as Activity. It is something like MainActivity.java.
MainActivity
You will start off from MainActivity. This is the default name of a Activity in Sketchware Pro. It is auto added.
You will have to add a Linear (V). Drag and drop a Linear (V) from the left bar. Select "center horizontal" and "center vertical" for the gravity of the linear. Then, drag and drop a button. Set the button text to "Hello world".
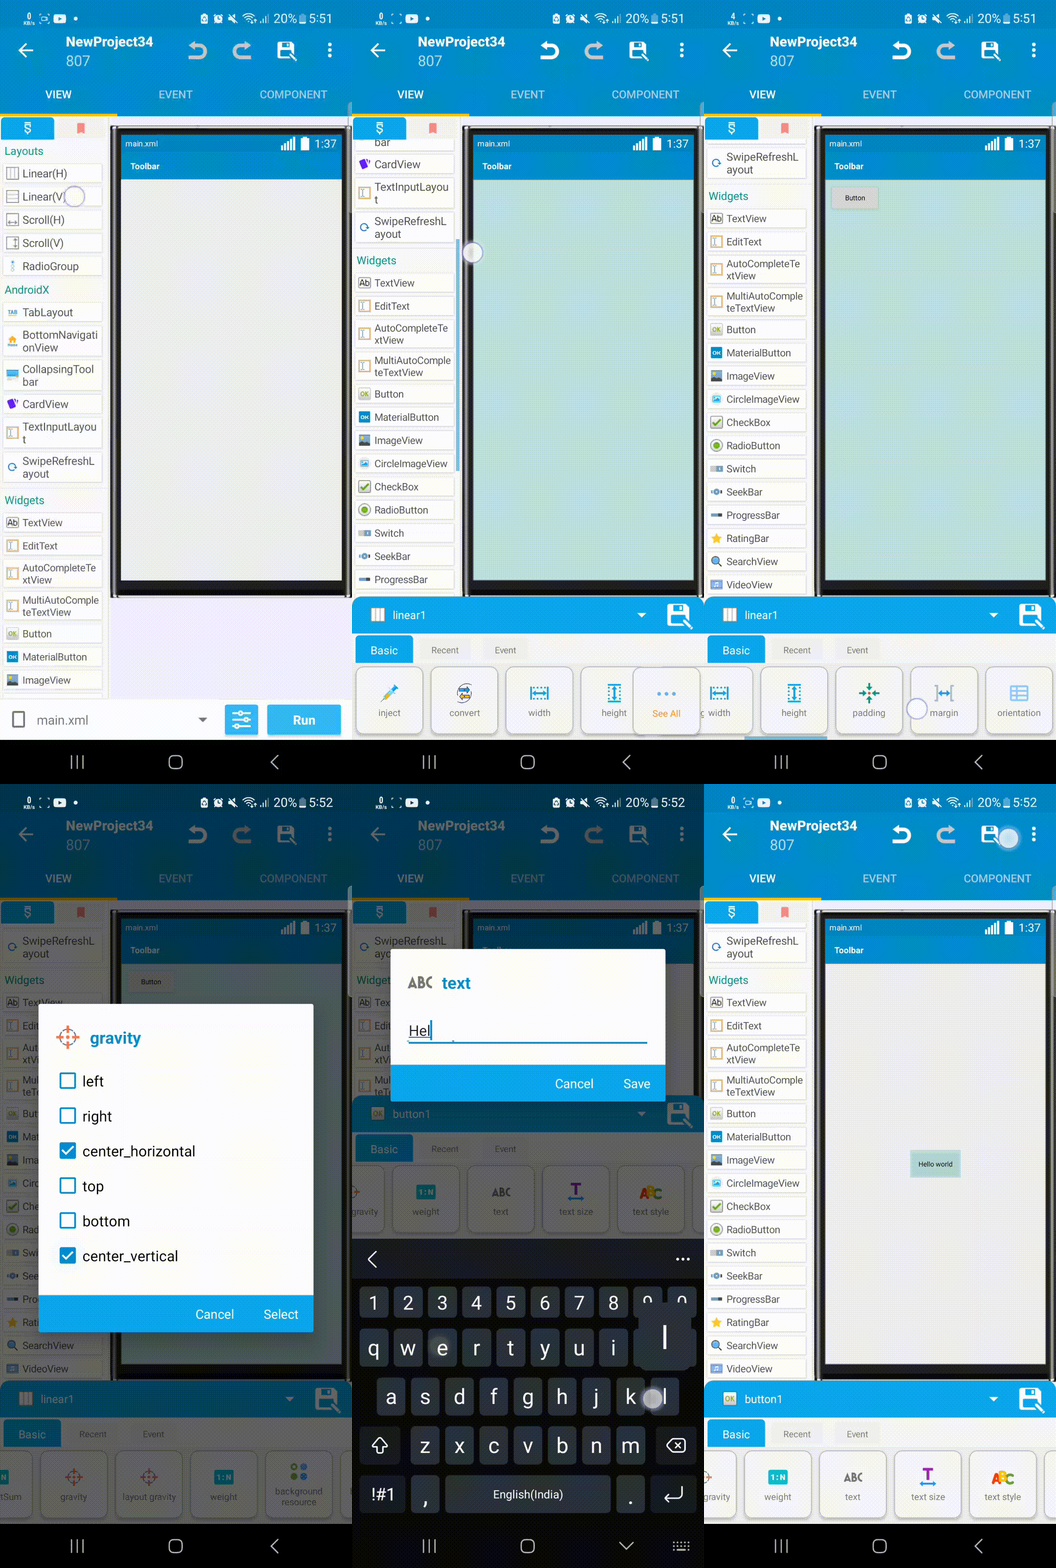
Now, clicking this button would take you to a new page(Activity) that says "Made by [your name]" So, let's design the new Activity first.
Page2Activity
You should be able to see "main.xml" written on the bottom of the screen. If you see a widget's properties, tap the back button once and you should be able to see it.
Tap on main.xml now.
Tap on the plus icon on top right.
Enter a name for activity. We are using page2. We recommend you to use this name for this tutorial.
Click Add.
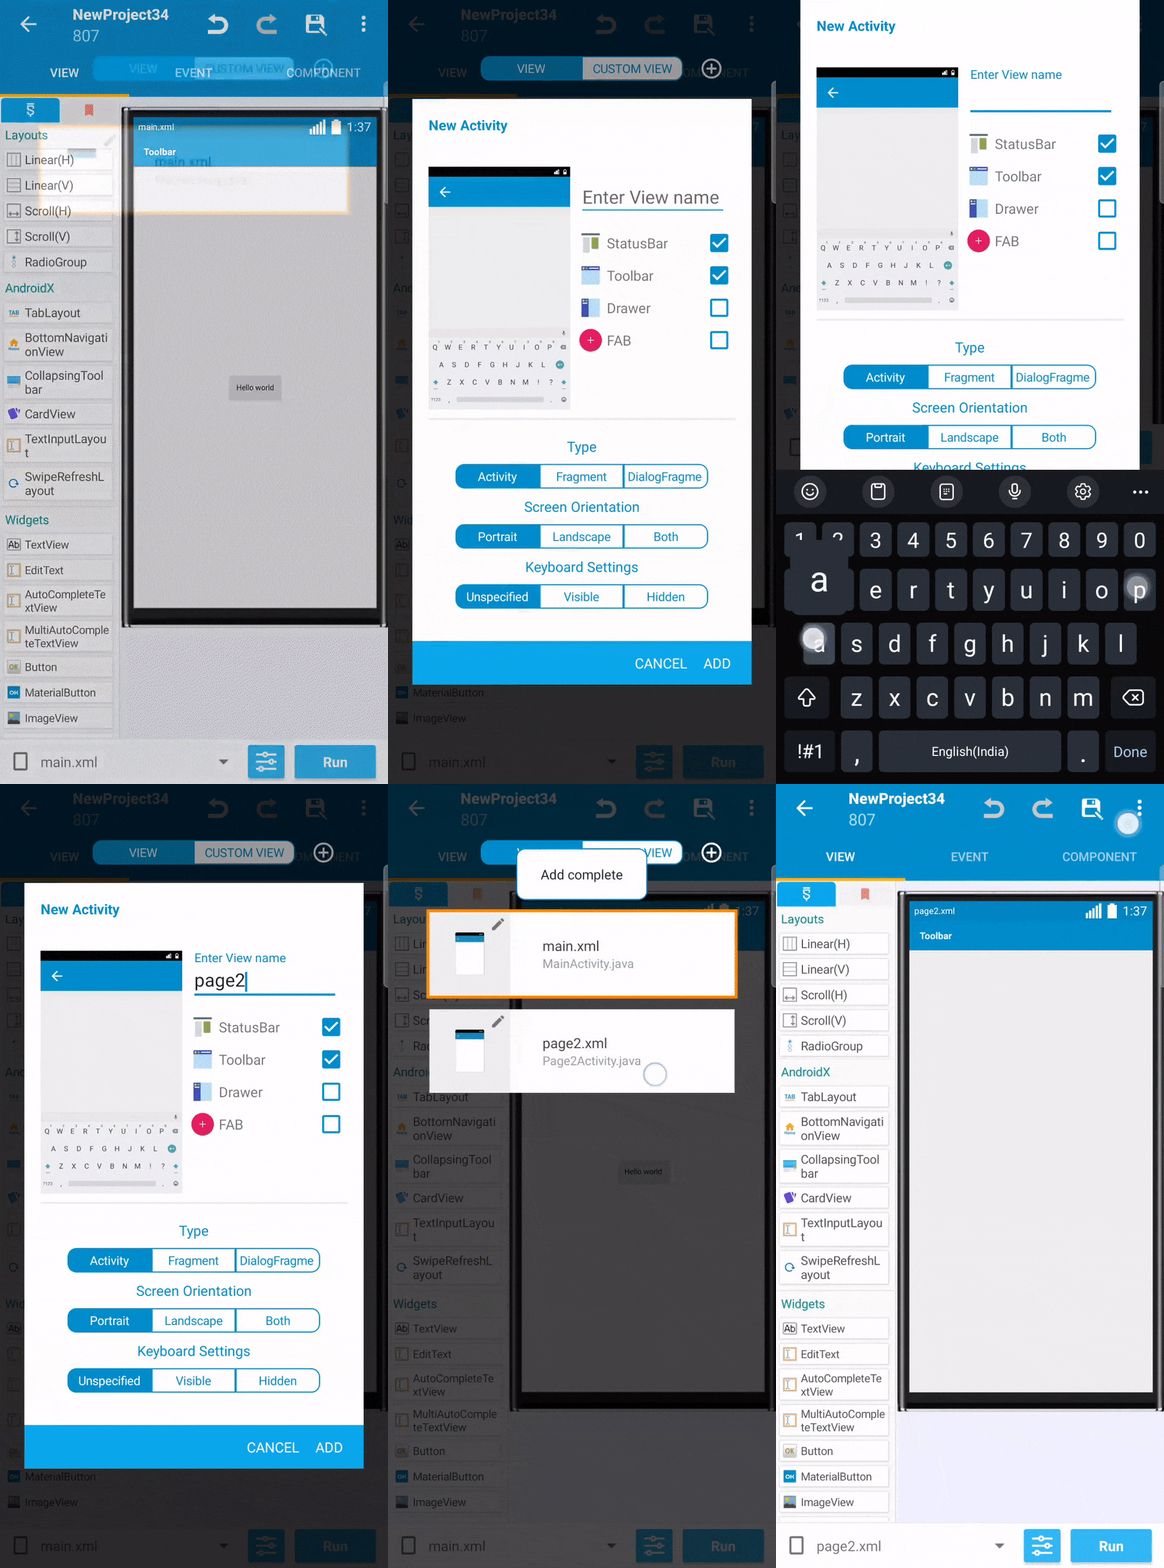 The same way we did last time, Add a Linear (V) with same properties. Instead of a button, Add a TextView instead this time. Set the TextView's text to
 Made by [Your name].
Page2 is now ready.
Programming
MainActivity
Now open MainActivity the way we opened Page2Activity. MainActivity is already there, no need to add.
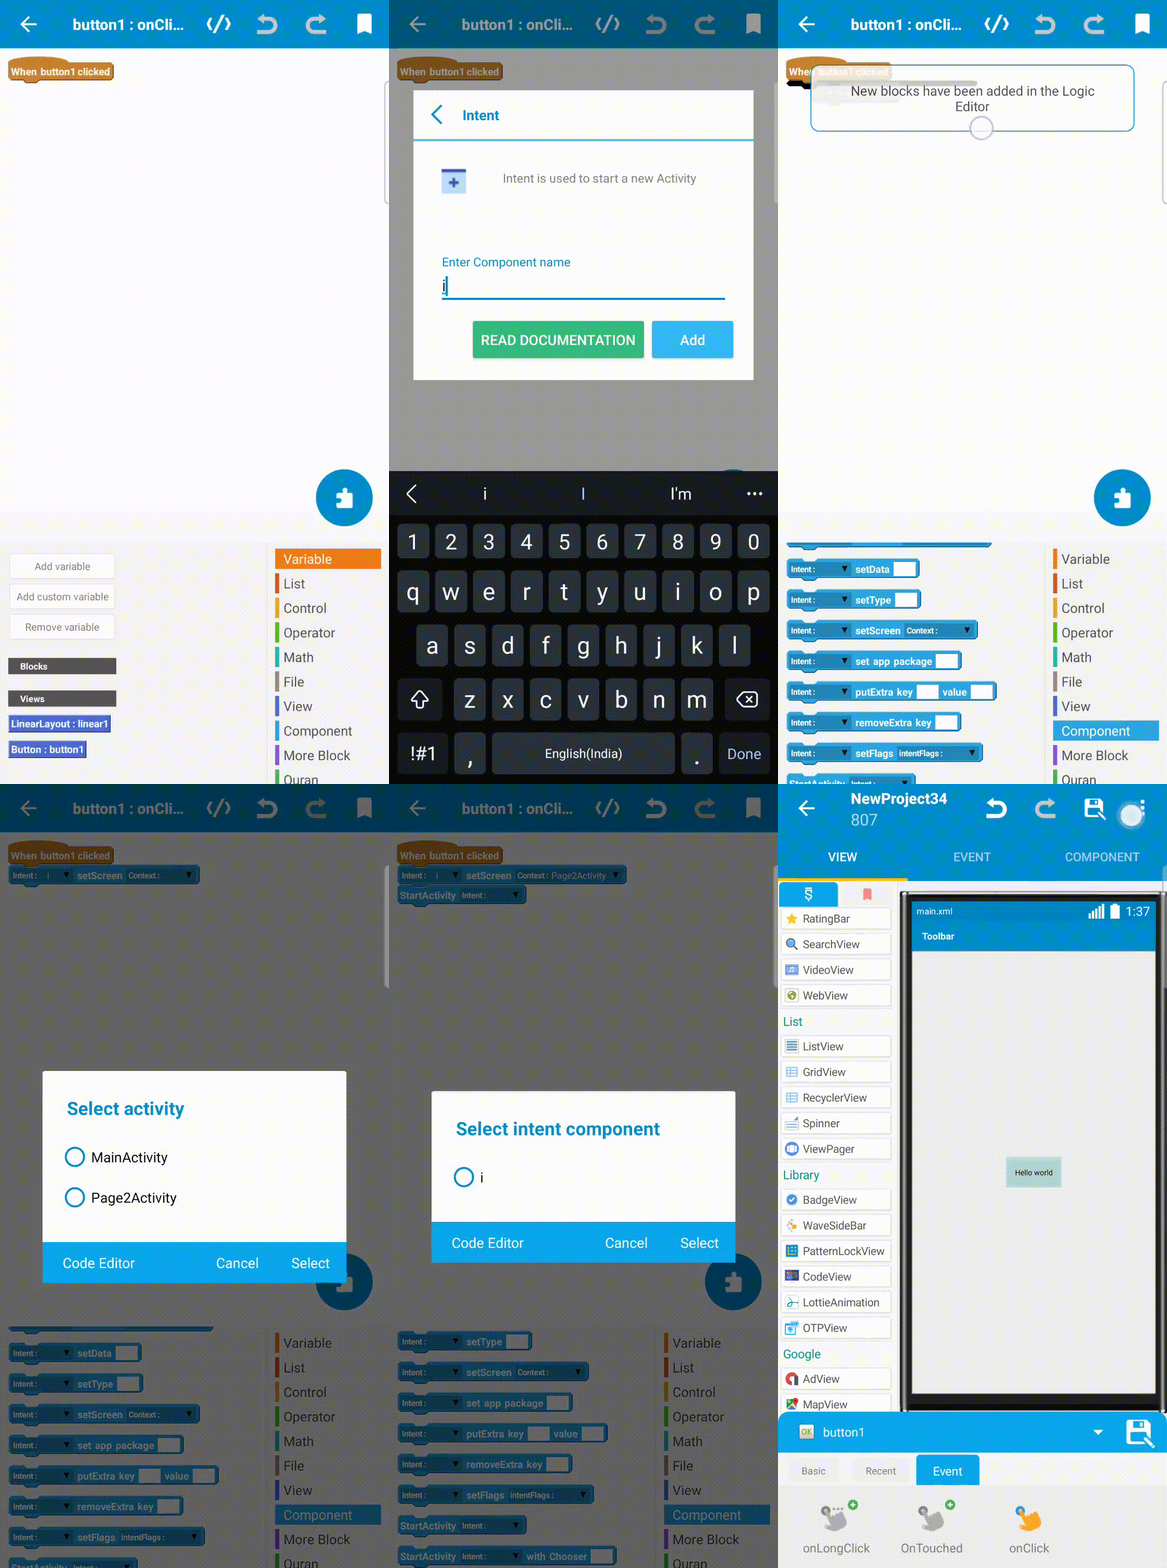
In the Main activity, click on the button that says "Hello world"(the one we added earlier).
Now, click on "Event". It is located on top of the button's properties.
 Now, select the
 onClick event.
Select the block icon on bottom right.
Then, click on Component.
Tap Add component.
Select intent. It's the first one.
Enter component name as i. It is recommended to keep short names so that the app size is as less as possible.
Click on Add.
Now, scroll down and drag and drop the setScreen block.
This block is used to tell the intent component which Activity to move in.
Select intent i and context Page2Activity.
Now, add a StartActivity block. Select i as the intent.
This block tells the intent component to do its job.
 Now you're done. Click the
 Run button on the bottom right to compile your very first app and use it.
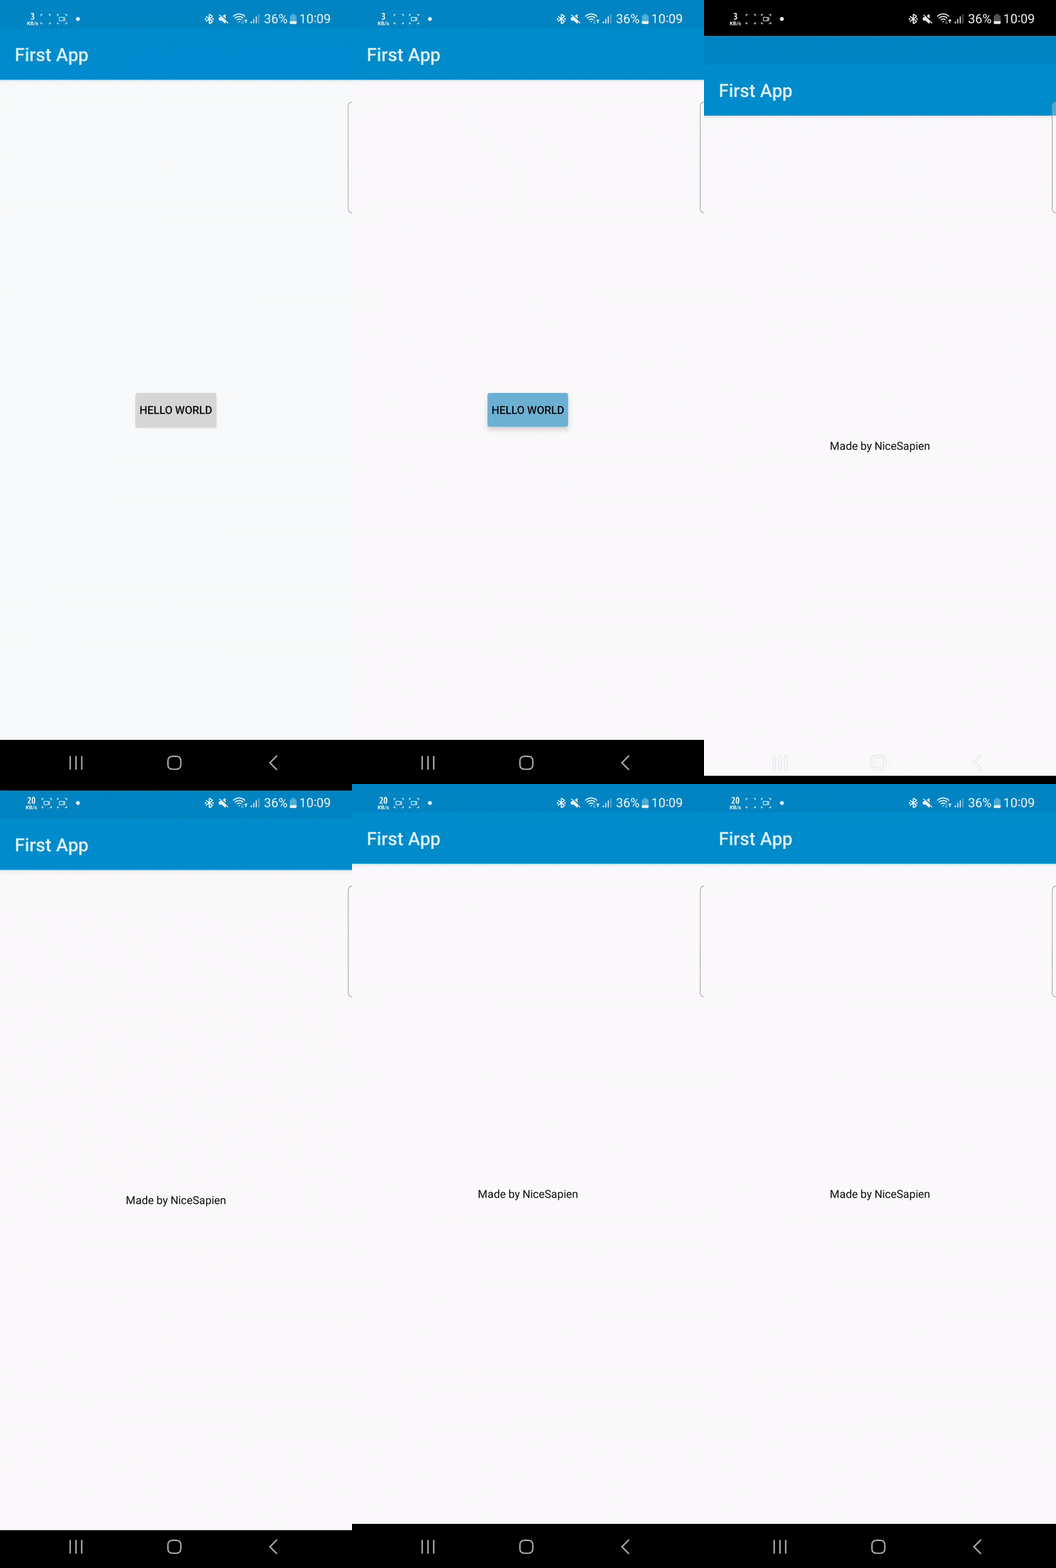
Final output app:
